Spring框架花式創建Bean的n種方法(小結)
常用的從容器中獲取bean實例使用這樣的方式:
@Testpublic void test() {Persion p = (Persion) ioc.getBean('p1');System.out.println(p);}
常用的在容器中配置組件使用這樣的方式:
<bean class='com.gql.bean.Persion'><property name='name' value='張三'></property><property name='age' value='18'></property><property name='email' value='[email protected]'></property><property name='gender' value='男'></property></bean>
下面的實驗介紹一些Spring容器中注冊組件對象的其他方法。
實驗1:根據bean的類型從ioc容器中獲取實例
@Testpublic void test01() {Persion p = ioc.getBean(Persion.class);System.out.println(p);}
這種方法查找的好處是不需要類型轉換,但是如果ioc容器中要找的bean有多個,使用這種方法查找就會報錯。可以改用下面的方式:
@Testpublic void test01() {Persion p = ioc.getBean('p1', Persion.class);System.out.println(p);}
實驗2:通過有參構造器為bean的屬性賦值
需要提前在bean中添加有參構造器,才能進行下面的測試。
<bean class='com.gql.bean.Persion'><constructor-arg name='name' value='李四'></constructor-arg><constructor-arg name='age' value='22'></constructor-arg><constructor-arg name='email' value='[email protected]'></constructor-arg><constructor-arg name='gender' value='男'></constructor-arg></bean>
使用這種有參構造器為bean的屬性賦值,可以省略name,但是value的順序必須與bean中的順序一致。(若再使用index和type進行索引,可以不按順序)
通過名稱空間為bean賦值:
添加p命名空間標簽頭:xmlns:p=“http://www.springframework.org/schema/p”
<bean p:name='小王' p:age='22'p:gender='男' p:email='[email protected]'></bean>
實驗3:為各種屬性賦值
引用類型、集合類型、級聯類型。
如題,給出一個賦值的Bean對象,為其在容器中注冊。此時所有復雜的賦值都在property標簽體內。
public class Persion {private String name;private String gender;private Integer age;private String email;private Car car;private List<Book> book;private Map<String, Object> maps;private Properties properties;//省略setter與getter方法}
普通屬性賦值:
<!-- 普通屬性賦值 --><property name='name' value='張三'></property><property name='gender' value='男'></property><property name='age' value='20'></property><property name='email'><null /></property>
引用類型賦值:
<bean class='com.gql.bean.Persion'><!-- 引用外部bean --><!-- <property name='car' ref='c1'></property> --><!-- 引用內部bean(內部bean不能被獲取到) --><property name='car'><bean class='com.gql.bean.Car'><property name='carName' value='自行車'></property><property name='color' value='黑色'></property><property name='price' value='400'></property></bean></property></bean><bean class='com.gql.bean.Car'><property name='carName' value='寶馬'></property><property name='color' value='白色'></property><property name='price' value='30000'></property></bean>
集合類型賦值:
list
<bean class='com.gql.bean.Persion'><property name='book'><list><bean p:bookName='西游?' p:author='吳承恩'></bean><ref bean='book01' /></list></property></bean><bean class='com.gql.bean.Book'><property name='bookName' value='水滸傳'></property><property name='author' value='施耐庵'></property></bean>
map
<property name='maps'><map><entry key='k01' value='v01'></entry><entry key='k02' value='v02'></entry><entry key='k03' value-ref='book01'></entry><entry key='k04'><bean class='com.gql.bean.Car'><property name='carName' value='捷豹'></property><property name='color' value='紅色'></property><property name='price' value='50000'></property></bean></entry></map></property>
properties
<property name='properties'><props><prop key='username'>root</prop><prop key='password'>123456</prop></props></property>
實驗4:通過繼承實現bean配置信息的重用
下面的代碼中p4繼承了p3,需要改動的屬性在property標簽中修改即可,其余的全部原樣繼承。
<bean class='com.gql.bean.Persion'><property name='name' value='張三'></property><property name='age' value='20'></property><property name='gender' value='男'></property><property name='email' value='[email protected]'></property></bean><bean parent='p3'><property name='name' value='李四'></property></bean>
實驗5:單實例singleton和多實例prototype
單實例singleton 多實例prototype ①容器啟動時創建好對象并保存在容器中 ①獲取Bean時才會創建這個對象 ②調用初始化方法 ②調用初始化方法 ③容器關閉時調用銷毀方法 ③容器銷毀時不調用銷毀方法 任何時間獲取都是獲取之前創建好的那個對象 每次獲取都會創建一個新的對象
詳情可參照博客:通過工廠創建Bean的三種方式
實驗6:創建帶有生命周期的Bean
ioc容器中注冊的組件:
單實例:容器啟動的時候就會創建好,容器關閉也會銷毀創建的bean。 多實例:獲取的時候才創建。可以為bean自定義一些生命周期方法,spring在創建或銷毀的時候就會調用指定的方法。
(1)單實例Singleton測試
在Book類中創建方法:
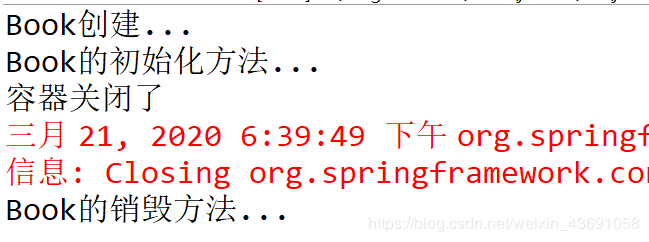
package com.gql.bean;public class Book {private String bookName;private String author;public void myInit() {System.out.println('Book的初始化方法...');}public void myDestory() {System.out.println('Book的銷毀方法...');}public Book() {super();// TODO Auto-generated constructor stubSystem.out.println('Book創建...');}}
在xml中注冊組件:
<bean destroy-method='myDestory' init-method='myInit'></bean>
測試:
在ApplicationContext中沒有close方法,需要將容器類型轉換為ConfigurableApplicationContext 。
public class IoCTest {ConfigurableApplicationContext ioc = new ClassPathXmlApplicationContext('ApplicationContext.xml');@Testpublic void test10() {System.out.println('容器關閉了');ioc.close();}}
(2)多實例prototype測試
只需要改變xml中注冊組件為多實例:
<bean destroy-method='myDestory' init-method='myInit' scope='prototype'></bean>
仍然使用上面的方法進行測試:
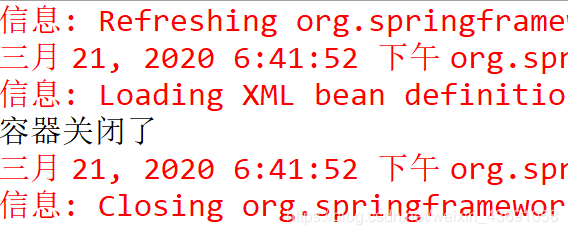
可以看到容器的創建銷毀一系列都沒有進行,這是因為多實例在獲取bean的時候才創建實例。
多實例測試中增加獲取bean:
@Testpublic void test10() {Object bean = ioc.getBean('book01');System.out.println(bean);System.out.println('容器關閉了');ioc.close();}

測試結果中,成功創建了實例,但是容器關閉并沒有銷毀Bean。
實驗7:測試Bean的后置處理器
后置處理器有一點代理對象的意思,使用后置處理器,Bean的生命周期變成下面的樣子:
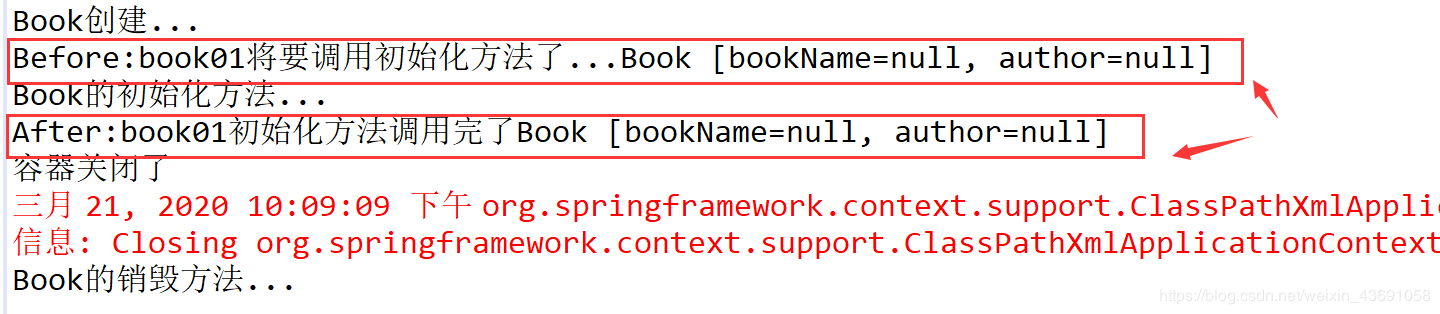
容器啟動—>后置處理器Before—>初始化方法—>后置處理器After—>容器關閉(調用銷毀方法)
不管有沒有初始化方法,后置處理器都會默認其有,繼續工作。
后置處理器:
package com.gql.bean;import org.springframework.beans.BeansException;import org.springframework.beans.factory.config.BeanPostProcessor;/** * 1.編寫后置處理器 * 2.將后置處理器注冊在配置文件 * @author guoqianliang * */public class MyBeanPostProcessor implements BeanPostProcessor {/** * 初始化前調用 */@Overridepublic Object postProcessBeforeInitialization(Object bean, String beanName) throws BeansException {// TODO Auto-generated method stubSystem.out.println('Before:' + beanName + '將要調用初始化方法了...' + bean);return bean;}/** * 初始化后調用 */@Overridepublic Object postProcessAfterInitialization(Object bean, String beanName) throws BeansException {// TODO Auto-generated method stubSystem.out.println('After:' + beanName + '初始化方法調用完了' + bean);return bean;}}
將后置處理器注冊在配置文件:
<?xml version='1.0' encoding='UTF-8'?><beans xmlns='http://www.springframework.org/schema/beans'xmlns:xsi='http://www.w3.org/2001/XMLSchema-instance'xsi:schemaLocation='http://www.springframework.org/schema/beans http://www.springframework.org/schema/beans/spring-beans.xsd'><bean destroy-method='myDestory' init-method='myInit' scope='singleton'></bean><!-- 后置處理器:可以在bean的初始化前后調用方法 --><bean class='com.gql.bean.MyBeanPostProcessor'></bean></beans>
測試:
@Testpublic void test11() {Object bean = ioc.getBean('book01');System.out.println('容器關閉了');ioc.close();}
實驗8:引用外部文件
在Spring中bean默認都是單實例的,而數據庫作為單實例是最好不過的,一個項目就是一個連接池,連接池里面管理很多連接,連接是直接從連接池中拿。可以讓Spring幫我們創建連接池對象,管理連接池。
注冊連接池第一代
在配置中注冊連接池:
<bean class='com.mchange.v2.c3p0.ComboPooledDataSource'><property name='user' value='root'></property><property name='password' value='Hudie'></property><property name='jdbcUrl' value='jdbc:mysql://localhost:3306/test'></property><property name='driverClass' value='com.mysql.jdbc.Driver'></property></bean>
測試:
@Testpublic void test12() throws SQLException {// 從容器中拿到連接// DataSource bean = (DataSource) ioc.getBean('dataSource');DataSource bean2 = ioc.getBean(DataSource.class);System.out.println(bean2.getConnection());}
成功獲取到了這個連接:

注冊連接池第二代
在config包下創建一個dbconfig.properties用來保存數據庫連接信息。
為了防止配置文件中的key與Spring自己的關鍵字沖突。可以為key加一個前綴,業內通用的做法是使用jabc.xxx
jdbc.username:rootjdbc.password:Hudiejdbc.jdbcUrl:jdbc:mysql://localhost:3306/testjdbc.driverClass:com.mysql.jdbc.Driver
注冊數據庫連接池:
<bean id='dataSource'class='com.mchange.v2.c3p0.ComboPooledDataSource'><property name='user' value='${jdbc.username}'></property><property name='password' value='${jdbc.password}'></property><property name='jdbcUrl' value='${jdbc.jdbcUrl}'></property><property name='driverClass' value='${jdbc.driverClass}'></property></bean>
測試:
@Testpublic void test12() throws SQLException {DataSource bean2 = ioc.getBean(DataSource.class);System.out.println(bean2.getConnection());}

到此這篇關于Spring框架花式創建Bean的n種方法的文章就介紹到這了,更多相關Spring 創建Bean內容請搜索好吧啦網以前的文章或繼續瀏覽下面的相關文章希望大家以后多多支持好吧啦網!
相關文章:
 網公網安備
網公網安備