Vue計時器的用法詳解
本文實例為大家分享了Vue實現計時器的具體代碼,供大家參考,具體內容如下
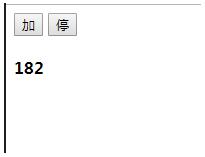
1、初始值為0,點擊【加】按鈕,數字自+1;連續點擊【加】,不影響數字+1
2、點擊【停】按鈕,停止+1
源碼:<!DOCTYPE html><html add='en'> <head> <meta charset='UTF-8'> <meta name='viewport' content='width=device-width, initial-scale=1.0'> <meta http-equiv='X-UA-Compatible' content='ie=edge'> <title>Document</title> <!-- 1. 導入Vue包 --> <script src='http://www.aoyou183.cn/bcjs/lib/vue-2.4.0.js'></script></head> <body> <!-- 2. 創建一個要控制的區域 --> <div id='app'> <input type='button' value='加' @click='add'> <input type='button' value='停' @click='stop'> <h4>{{ count }}</h4> </div> <script> var vm = new Vue({ el: ’#app’, data: {count: 0,intervalId: null }, methods: {add() { // 計時器正在進行中,退出函數 if (this.intervalId != null) { return }; // 計時器為空,操作 this.intervalId = setInterval(() => { this.count += 1 }, 400)},// 停止定時器stop() { clearInterval(this.intervalId)//清除計時器 this.intervalId = null;//設置為null } } }) </script></body> </html>
之前小編收藏了一個開始計時的組件,這個組件可直接引入到項目中使用,謝謝原作者分享。
<template> <div class='timer'> <div ref='startTimer'></div> </div> </template> <script> export default { name: ’Timer’, data () { return { timer: '', content: '', hour: 0, minutes: 0, seconds: 0 } }, created () { this.timer = setInterval(this.startTimer, 1000); }, destroyed () { clearInterval(this.timer); },methods: { startTimer () { this.seconds += 1; if (this.seconds >= 60) { this.seconds = 0; this.minute = this.minute + 1; }if (this.minute >= 60) { this.minute = 0; this.hour = this.hour + 1; } this.$refs.startTimer.innerHTML = (this.minutes < 10 ? ’0’ + this.minutes : this.minutes) + ’:’ + (this.seconds < 10 ? ’0’ + this.seconds : this.seconds); } } } </script> <style></style>
以上就是本文的全部內容,希望對大家的學習有所幫助,也希望大家多多支持好吧啦網。
相關文章:

 網公網安備
網公網安備